

Create your first interview
An interview is one set of questions for a role, with its own link that candidates use to take it. Creating one takes two steps: the interview details, then the questions.
Before you start
Section titled “Before you start”- Have the job description ready. Talvin uses it to write better questions.
- On the free experience, you can create one interview. It’s saved as Inactive, so candidates can’t take it until you upgrade to a paid plan.
- On the free experience you also can’t edit or delete that interview. Upgrading unlocks both.
Step 1: Add the interview details
Section titled “Step 1: Add the interview details”- In the left menu, click Interviews.
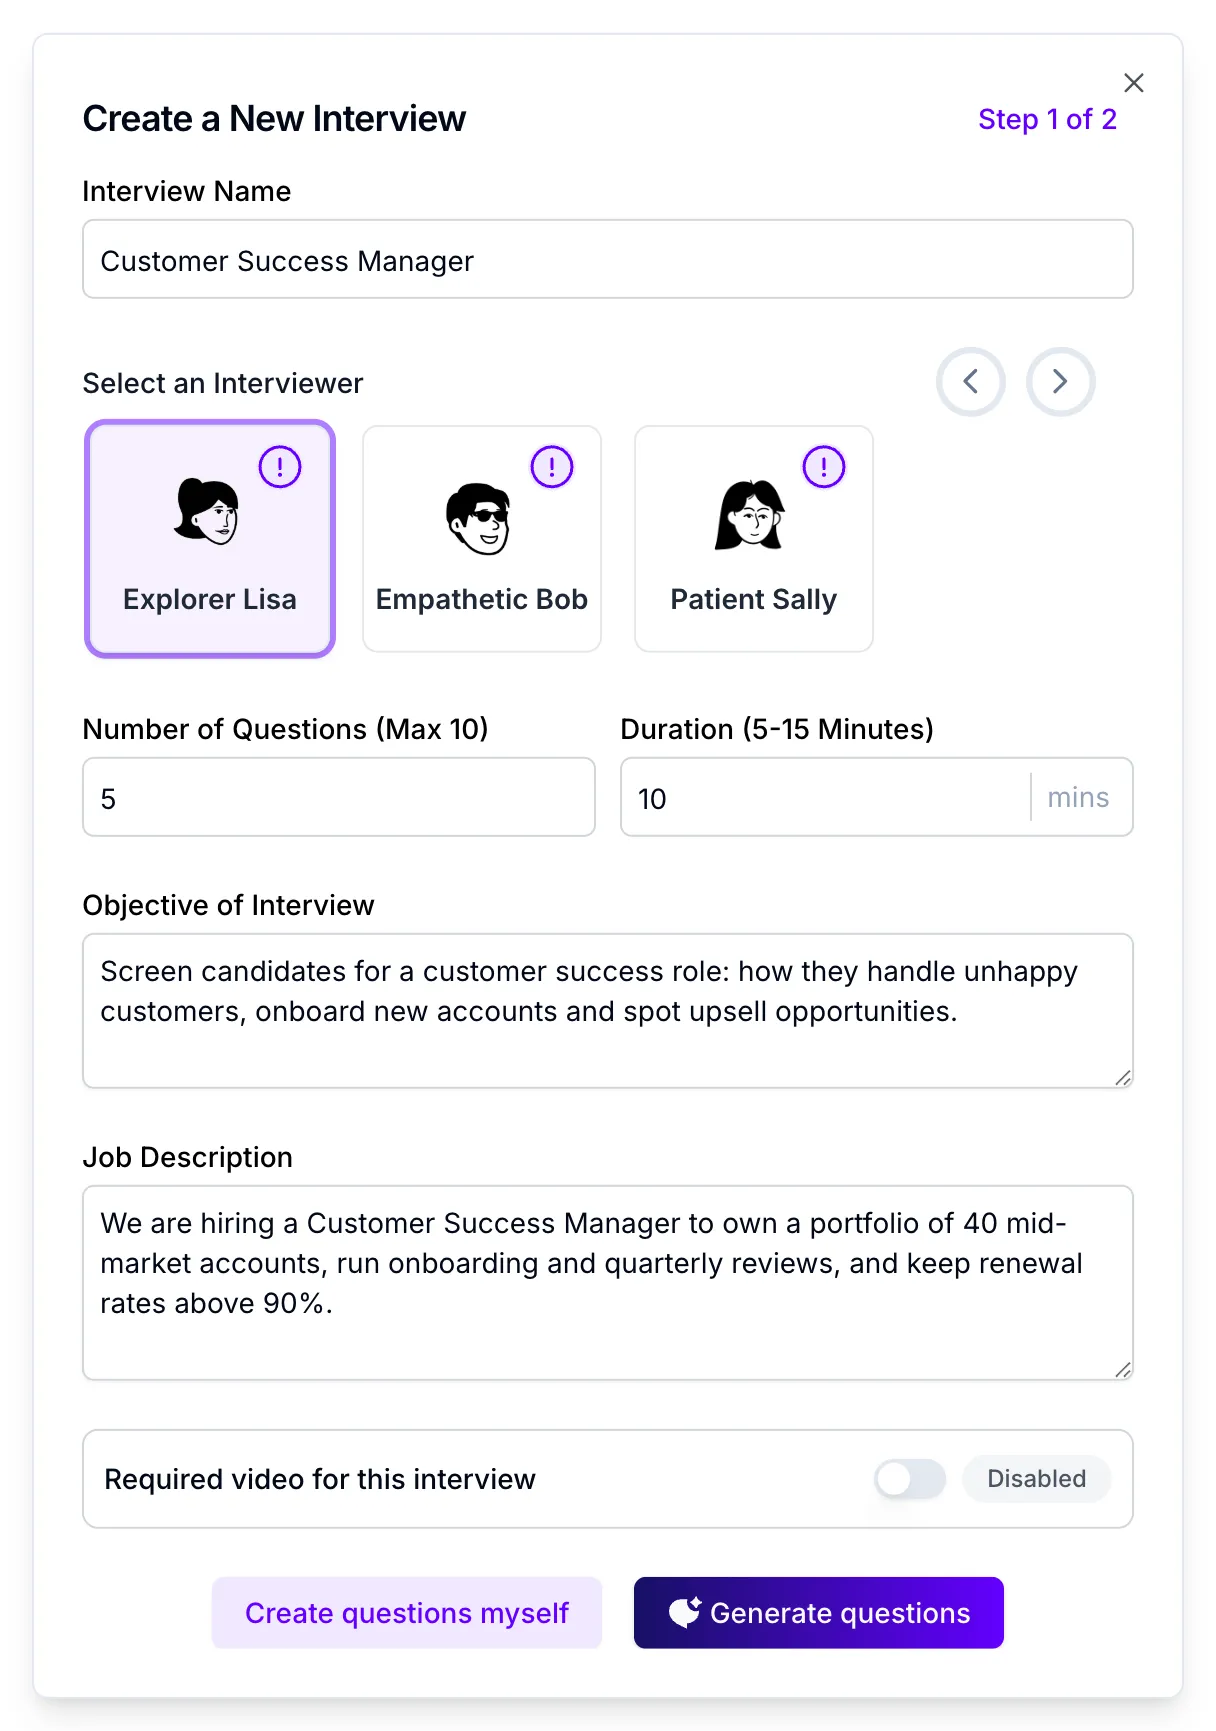
- Click Create an Interview. The Create a New Interview window opens at Step 1 of 2.
- Fill in the details:
- Interview Name: usually the job title, for example “Customer Success Manager”. You can’t change the name after you create the interview.
- Select an Interviewer: click the AI interviewer you want. Click the i icon on a card to see how that interviewer rates for empathy, exploration, rapport and speed, and to hear their voice.
- Number of Questions (Max 10): any number from 1 to 10.
- Duration (5-15 Minutes): how long the interview should last.
- Objective of Interview: what you want to find out about candidates, for example “Assess experience managing enterprise accounts and handling difficult conversations”.
- Job Description (optional): paste the job description.
- Required video for this interview (paid plans only): turn this on if you want candidates on camera and a video recording of the interview.
Step 2: Add your questions
Section titled “Step 2: Add your questions”Choose how you want to create the questions:
- Generate questions: Talvin writes the questions and the interview description for you, based on the details from step 1. This is the quickest way to start.
- Create questions myself: Talvin writes the interview description, and you write each question.
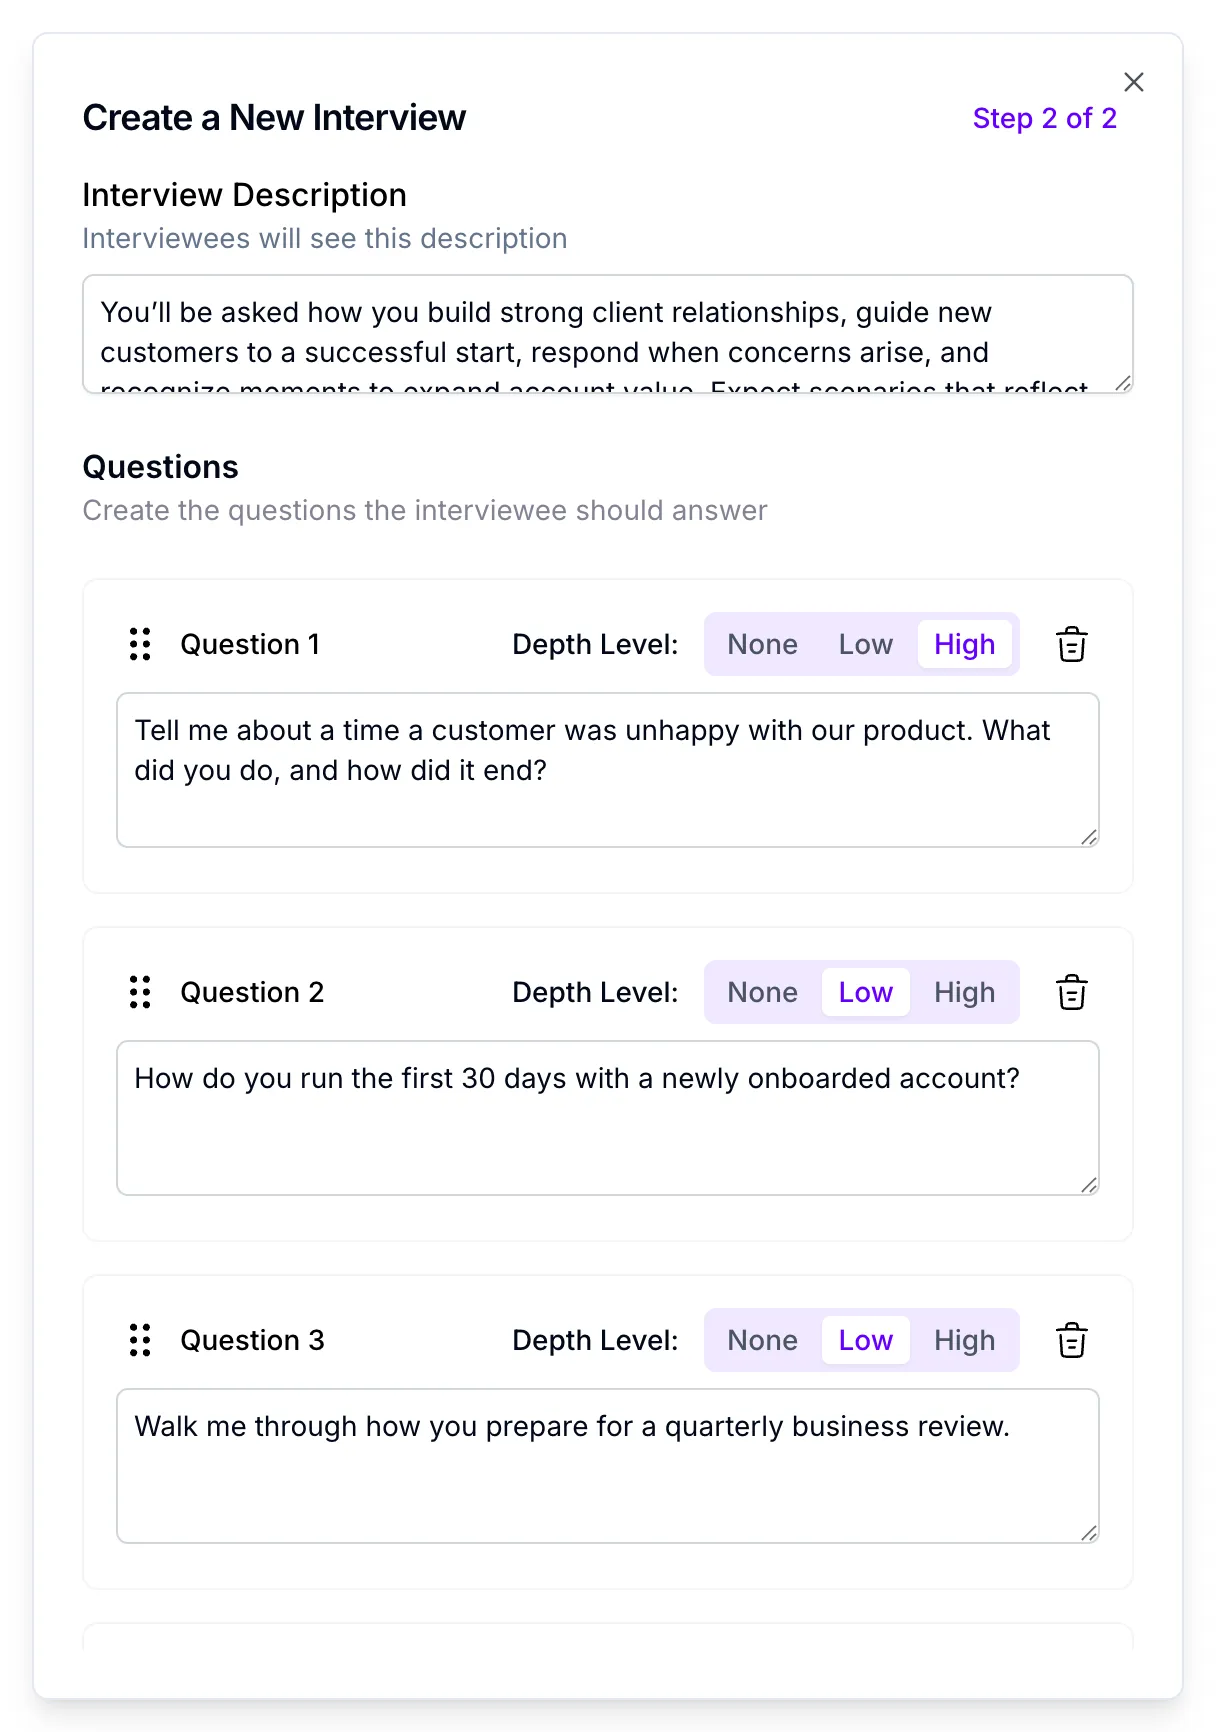
Either way, you can review and change everything on the Step 2 of 2 screen.
- Check the Interview Description. Candidates see this before they start, so keep it clear and friendly. It can be up to 500 characters.
- Review each question. Edit the text, drag the handle on the left to reorder, or click the bin icon to delete one.
- For each question, set the Depth Level:
- None: no follow-up.
- Low: a brief follow-up.
- High: an in-depth follow-up.
- Make sure you have exactly the number of questions you chose in step 1. If you deleted one, click Add Question to add another.
- Click Submit.
To change the step 1 details, click Back. Your questions are kept.
Step 3: Share the interview
Section titled “Step 3: Share the interview”What you see next depends on your plan.
On a paid plan
Section titled “On a paid plan”You’ll see Share your interview instantly, and the interview is live.
- Option 1: Copy Interview Link. Click Copy Link and paste the link wherever you contact candidates, such as your ATS, a job post or a message.
- Option 2: Send via email. Click Copy Email to copy a ready-made invitation that includes the link, then paste it into your own email.
Click Done to close the window.
On the free experience
Section titled “On the free experience”You’ll see Your interview is ready. The interview is saved but not live, so candidates can’t take it yet.
Click View plans to upgrade, or Done to close the window. After you upgrade, open the interview and turn on the Active switch.
Invite candidates by email
Section titled “Invite candidates by email”Instead of sending the link yourself, you can have Talvin email candidates for you. This works on paid plans, for active interviews.
- Open the interview from the Interviews page.
- Click + Invite Candidates.
- Choose Add individually or Bulk upload CSV, and add your candidates.
- Leave Automatic reminders on to remind anyone who hasn’t taken the interview after 2 days, and again on day 4–5.
- Click Send invites. The button shows how many invites you’re sending.
You can follow who has taken the interview on the Invited tab. For details, see Invite candidates.
Find the interview link later
Section titled “Find the interview link later”You can copy the link again at any time while the interview is active:
- On the Interviews page, click the copy icon in the top-right corner of the interview card.
- On the interview’s own page, click the copy icon next to the interview name.
If the copy icon is grayed out, the interview is inactive or your organization has run out of credits.
Turn an interview on or off
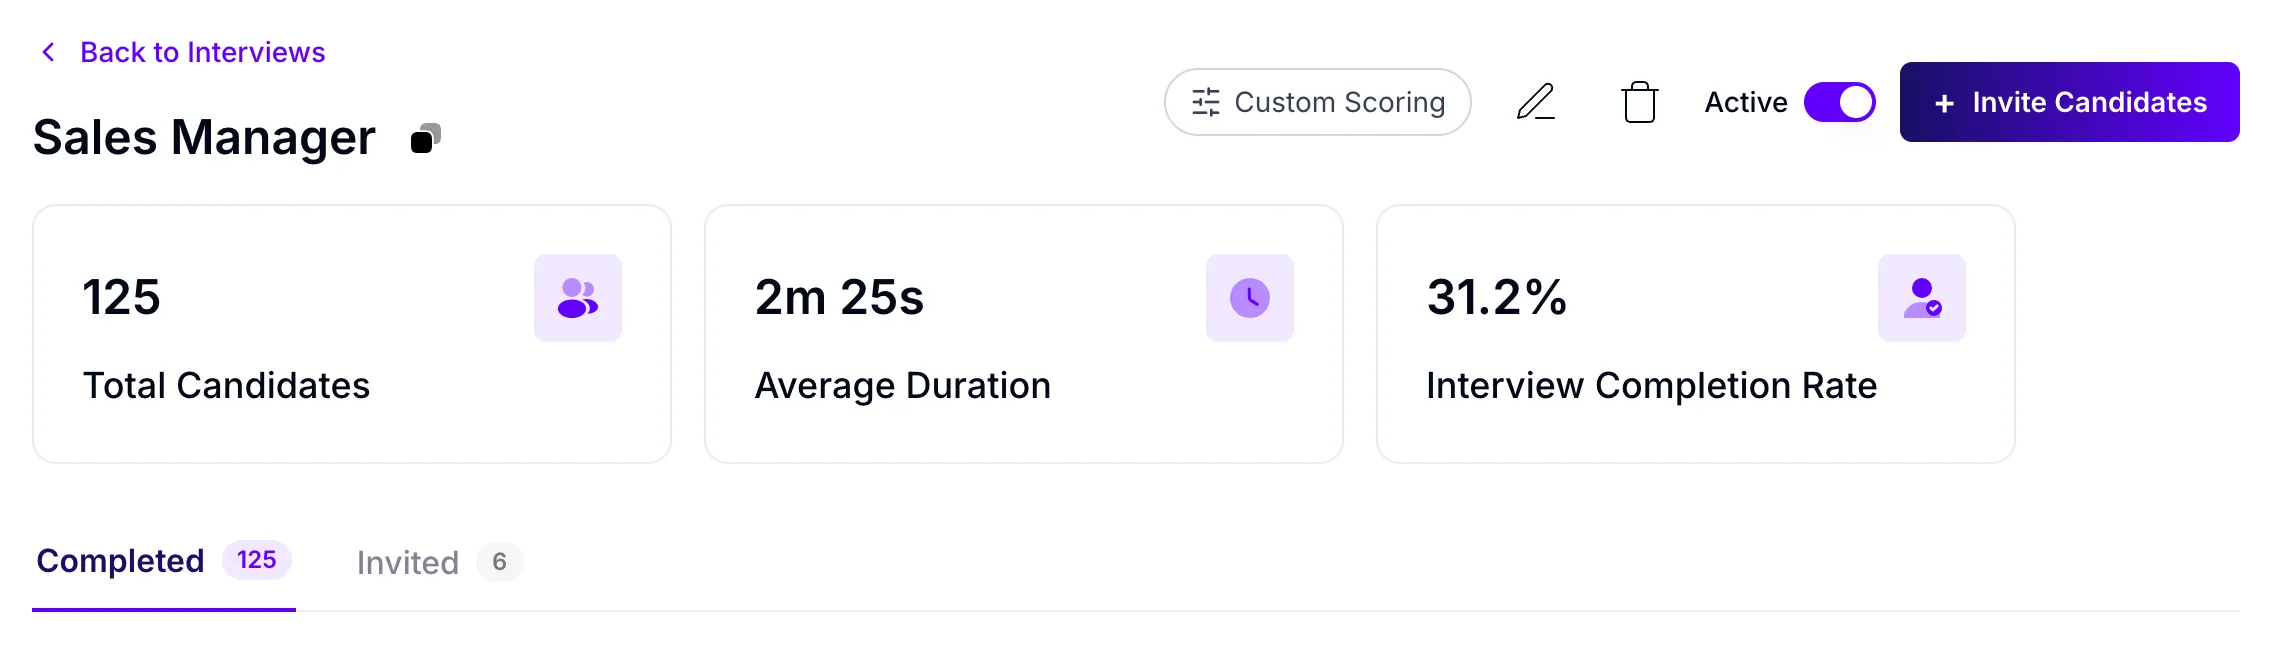
Section titled “Turn an interview on or off”Each interview has an Active switch at the top of its page. Turn it off when you’ve finished hiring for the role.
When an interview is off, or your organization has no credits left, candidates who open the link see Interview Is Unavailable. Turning an interview on needs a paid plan, and your plan may limit how many interviews you can have.
Try it yourself first
Section titled “Try it yourself first”Before you send the link to candidates, take the interview yourself to hear how it sounds. Open the link in your browser and follow the steps as a candidate would.
Keep in mind:
- Your test uses credits, like any other interview.
- Each email address can take an interview only once, so use an email you won’t need for a real candidate.
- Your test shows up in the results. You can delete it from the candidate list with Delete Response.
Common questions
Section titled “Common questions”I get a “reached the limit” message when I click Create an Interview. You’ve created as many interviews as your plan allows. Upgrade your plan. On a paid plan, you can also delete an interview you no longer need.
Can I change an interview after I create it? Yes, on a paid plan. Open the interview and click the pencil icon (Edit Interview). You can change everything except the interview name.
Why is my interview Inactive? Interviews created on the free experience stay inactive until you upgrade. On a paid plan, check that the Active switch is on.